admin, Author at Delete Computer History - Page 6 of 15

Remove Zlob

Posted by | Uncategorized | No Comments
How to Remove Zlob Trojan

There are over thousand searches a day for how to remove zlob trojan virus. Unlike most trojans, its particularly powerful due to new technology that allows it to infiltrate your computer easily. Its more modern software architecture also makes it particularly difficult for many spyware programs to find. The steps below will help you to remove zlob trojan permanently from your PC.

What is Zlob?

Zlob is a commonly used trojan that highly used by a variety of malware programs. The trojan’s downloader was connected to a lot of video codec packs. It has also been attached to social network links. Once this link is clicked it signals a downloader transfers spyware files from remote servers.

Files used to transfer Zlob.

Most people are very careful about clicking spam links however there are other files that the zlob trojan is attached to:
CODEC PACKS
Social Network LINKS
fake antispyware programs
fake media players

You can use a reputable antispyware program to check the files or links before you access them. This a a good preemptive step to avoid downloading the virus into your browser.

Steps to Remove Zlob.

STEP 1: Edit the Registry.

The best way to remove a trojan is editing your registry. Editing the registry is a delicate process. So back up the registry before attempting to remove it. There are three areas in your registry you will need to delete in order to remove zlob trojan.
Delete Computer History

Registry Edit A.

  • Click Start
  • Click Run
  • Type regedit
  • Find this registry key:

    HKEY_LOCAL_MACHINE\
    SOFTWARE\
    Microsoft\
    Windows\
    CurrentVersion\
    Policies\
    Explorer\
    Run\

  • Locate the value: “nvctrl.exe” = “nvctrl.exe”
  • DELETE it

Registry Edit B.

  • While the registry editor is open, find:

    HKEY_LOCAL_MACHINE\
    SOFTWARE\
    Microsoft\
    Windows\
    CurrentVersion\
    Explorer\
    BrowserHelperObjects\

  • Locate the key: {724510C3-F3C8-4FB7-879A-D99F29008A2F}
  • Delete it

Registry Edit C.

  • 1. In the same folder delete the registry key: {724510C3-F3C8-4FB7-879A-D99F29008A2F}

STEP 2: Stop Automatic Re-Installation

In order to not have to remove the zlob trojan again, you need to make sure it is not automatically loading up again in your startup. Check your startup configuration to ensure that the trojan exe files are not running

  • Open your Start menu.
  • Click Run
  • In the command screen type msconfig.exe
  • In the system configuration utility,click startup tab
  • Uncheck the process nvctrl.exe
  • Click OK

Delete Computer History

STEP 3: RE-RUN Anti-spyware

To completely remove the trojan files make sure that you run your anti-virus/anti-spyware programs again. This will make sure that all the files are removed. The previous step made the files more accssable. If the anti-spyware program failed to find it on the first go, it will have a better chance now. For Anti-spyware programs that have the ability to remove zlob, click here

Speed Up uTorrent

Posted by | Uncategorized | No Comments
Speed Up uTorrent

Can you speed up uTorrent? Yes, BitTorrent technology, like uTorrent, make downloading large files easy. However, some people are forced to wait hours for a download. There are ways to speed up uTorrent which will allow you to reduce the amount of time it takes to receive a large file. In essence this tutorial will help you configure uTorrent to be more efficient, connect to more seeds and faster.

Step 1: Check your Port Settings

One of the most important aspects of using uTorrent is configuring your port settings. It is often essential to configure your port settings of your router to get maximum download speeds and seed connections. You can speed up uTorrent significantly with this simple tweak. Here’s how:

  • Load uTorrent
  • Click Options
  • Choose Speed Guide
  • In the Speed Guide window, click “Test if port is forwarded properly”

If there are no problems, you are configured and ready to go. If a problem occurs you may need to configure you port settings. To correct this problem and speed up uTorrent you do this with ease at www.portforward.com

Delete Computer History

Step 2: Configure your Connection Settings

For uTorrent to work correctly, you need to inform the application on the your computer’s internet speed. This is a simple step that allow uTorrent to gauge how fast you can download. Follow the instructions below, if you haven’t already performed this during your initial install.

  • Load uTorrent
  • Click Options
  • Choose Speed Guide
  • In the Speed Guide window, click Connection Type
  • Choose your internet speed.

or

If you don’t know your speed click the test button at the top of the Speed Guide window.
Delete Computer History

Step 3: Manage Your Upload Speeds

Simultaneously uploading and download takes a considerable chunk of your bandwidth. In order to avoid the internet connection slowing to a crawl, you need to limit your upload speeds to about 80 to 90% of its capacity. Here is how:

  • Load uTorrent
  • Click Options
  • Select Bandwidth
  • Set your Global Download Rate Limiting to 90% of your upload bandwidth
  • Set maximum upload speed to around 80%

Delete Computer History

Step 4: Use Encryption options

This is an often disregarded option. However, it is very important. Your ISP sometimes limits peer to peer traffic such as Bittorrent to avoid a single user hogging the available bandwidth. The ISP know you are using p2p services by analyzing your traffic, aka traffic shaping. Encrypting your traffic helps to avoid the ISPs noticing your bittorent traffic. Here is how to use encryption:

  • Load uTorrent
  • Click Options
  • Choose Preferences
  • Click Bittorrent
  • In Protocol Encryption, check the box, Allow incoming legacy connections
  • Choose Forced for Outgoing.

Delete Computer History

If these option fail to speed up uTorrent. You may want to consider the torrent that you are choosing. If it lacks available seeds, the download speed will be very slow. You may need to check out other torrent sites.

Popular Articles

Best Registry Cleaner
Fix a Slow Internet Connection
PC Speed Killers

If you finished with the Speed up uTorrent page, check out Speed Up Internet Videos Page

Speed Up Computer Downloads

Posted by | Uncategorized | No Comments
Speed Up Computer Downloads

How to Speed Up Computer Downloads

Are you weary of slow computer download speeds? Is it your desire to speed up your computer downloads? Did you know that you can enjoy faster download speeds if only you followed simple steps and procedures? Don’t have any doubts because it is true that you can enjoy faster computer download speed if only you knew how to speed up computer downloads.

Why do you need to speed up computer downloads?

The internet has tons of useful files that you can download for your use. From books, to games, to videos, applications, software and much more, you will find yourself in need of some sort of performing downloads. What more, you will get all these things without physical movements and at a sitting. For this reason, if you are stuck with slow download speeds, it may be heartbreaking as you wait for ages to download a single file. Here are ways that you can speed up your computer downloads:
Delete Computer History

1. Prioritize Your Downloads

One mistake that you often do that often leads to slow download speeds is trying to download everything at once. This not only digs into your RAM and Processor speeds but also divides your bandwidth among the downloading files greatly reducing your internet download speeds in the process.

To help you with this problem, do not download everything at once. Ensure that you line up your downloads by order of priority such that when one download finishes, another begins. This way, you would have amazing download speeds as all the computer resources are channeled to one download process. In Bittorent clients you can optimize your downloads to stagger when they start or give them bandwidth priority. For more on speeding up uTorrent downloads, Click here.

2. Free Your Random Access Memory (RAM)

RAM is the temporary storage for computer programs and is only active when the computer is running. RAM often has limited space and is one of the determinants of the speeds at which the computer operates. If RAM is full, the computer will be very slow and your download speeds will greatly reduce.

To free some computer resources on RAM and increase the speeds at which the computer downloads, simply close any programs that you are not using. Where possible, let the download proceed without any computer usage and any program opened as this will dedicate the whole space in RAM to your download.

One way of closing programs is through the windows task manager. To access the task manager, simply use the shortcut keys ctrl+alt+delete. Once in the task manager, you can end tasks and processes. Click here to discover more ways to free up RAM

You need to see which programs are running in the background. Some of these programs may be splitting your badwidth by actively downloading information in the background. Check out the video to remove background programs .


3. Check Your Download time of day

There are some files that are on high demand and many people are often caught up in the web of trying to download the same file at the same time frame. If this happens, the file download will be slowed not only to you but also to everyone trying to download the given file. How do you go about this? Well, the best way to beat this is to ensure that you perform your download during a period in the day that many people may not be downloading the same file. For instance you can schedule your downloads at night when people are asleep. That way, you will be sure of faster download speeds.

4. Perform Virus Scans

Did you know that spyware and viruses can greatly slow your computer download speeds? Indeed, there are some viruses that interfere with computer processes while others interfere with computer resources. For this reason, your slow download speeds may be due to some computer viruses. Therefore, ensure that your anti-virus program is up to date and automatically scans for viruses from time to time. This will ensure that slow download speeds do not arise from system virus attacks.

5. Use Computer Speed Accelerator Software

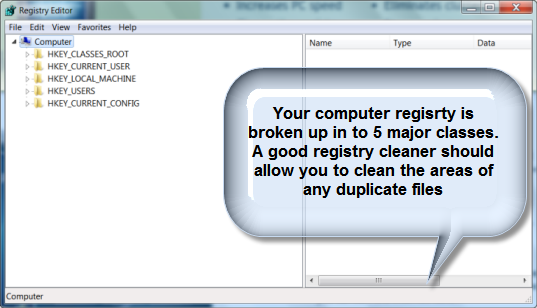
Whether paid or free, some computer download accelerator software are able to speed up computer downloads. These sets of computer software are able to clean the computer registry, free up computer resources and perform other activities that ensure your computer is at its best while downloading files. Examples of such software include the Download Accelerator Software and Speed It Up software. Also some browser add-ons can speed up computer downloads.

6. Contact Your Internet Service Providers (ISP)

As much as your computer may be connected to the internet, there are many factors that determine your internet speed. Of all those factors, your ISP may be the most important. Therefore, if you notice that you are experiencing slow download speeds, it would be appropriate to contact your ISP. There are many connection options that internet service providers offer and you may be needed to pay more for faster internet connection upgrades which will eventually lead to faster download speeds ensuring that you spend less time in performing computer downloads.

Internet connection speeds is measured by the quantity of data transferrable in a single second. It can either be quantified as Kilobits Per second (Kbps) or Megabits per second (Mbps). In one Megabit exists 1024 kilobits. If you are using a dial up connection, your speed may be limited to below 56Kbps while the cable connections can give up to a speed of 20Mbps. Therefore, speeding computer downloads can also be achieved by upgrading to cable connections if you were using a dial up connection.

In conclusion, we can state that if you have been wondering how to speed up computer downloads, the simple and easy to follow processes highlighted above will not only help you in enjoying faster downloads but also in increasing the general performance of your computer.

Check out ways to Optimize Your Internet for Speed

Now that you’ve learn how to speed up computer downloads, read more increasing upload speed.

Computer Video Problems

Posted by | Uncategorized | No Comments
Computer Video Problems

Tackling Common Computer Video problems

Some common computer video problems that you may encounter while watching a DVD or an online video on a computer can be easily to fixed. Common issues such as video freeze or slow loading or long buffering can be solved by following the below step by step guide to have uninterrupted video watching on a computer.

Step 1: First and foremost, you needto check the internet connection. If found to be stopped or disconnected, reconnect and try again

Step 2: Sometimes, videos buffer for a longer time to receive the video data. In such a condition, you can reduce the quality of the video available as a ready option on most online video players. You can also consider upgrading your internet connection or modem as it may not be of sufficient speed to provide smooth video play. Find out how to speed up a slow internet connection

Step 3: Try updating your default media player. To update media player, click on the “Help” tab from the top most bar and select the option “Check for Updates”. Follow the instructions to have the media player updated.

Step 4: Another reason for slow video uploading could be that your media player is corrupted. If that is the case, you may get frequent error messages or the media player fails to start up. You can easily reinstall the media player or can download a newer version.

To reinstall from the installer CD, go to Control Panel and double click on the “Add or Remove Programs”. Select the “Change/Remove” option to install from the CD.

OR

Search and navigate the website to download a fresh and cleaner version of a compatible media player.

Step 5: You may also try to update your driver software by selecting “Run” from the Start Menu and type “devmgmt.msc” (without quotes) to start Device Manager. Expand the display adapter option and select the option for “Update Driver Software”. To see step by step guide to update drivers, Click here.

Step 6: If you have any additional video or display card, select “Sound, Video and Game Controller” from the device manager and select “Update Driver Software”.

Disable Aero

Posted by | Uncategorized | No Comments
How to Disable Aero in Windows

Disable Aero in Windows if you having sluggish performance. Aero is a great addition to Windows. It adds a host of graphical flares. One on the major graphical options is translucency. This allows you to see through different windows. This is known as Windows Glass effect.

Another great option that Windows Aero has is the the ability to cycle through Windows. This is an awesome display that allow you to cycle through different programs in a 3D space on your desktop as if they were files it looks great. However, it definitely takes tons of resources.

If you disable Aero, you will also lose the option to use taskbar previews. This option allows you to scroll across items in your taskbar to reveal more information. Once you point the mouse over this information, it will be represented as a Window tile.

It’s recommended that you remove Aero to get a boost in the RAM, department. However, if your focus is on beauty and appearance, you should just simply keep it and try to remove other options one by one until you are satisfied with your customization.

Here is how to disable Windows 7 Aero Theme.

  • Click Start
  • Chose Control Panel
  • Choose Apperance and Personalization
  • Chose the Personalization option.
  • Scroll down to High Contrast and Basic Themes and Select a theme.

Once you done this you will have disabled Windows Aero Theme. Window will take a few seconds to reformat itself and you will have your new high contrast theme.

There are certainly other ways to customize Windows graphics. You can use the personalization options to make Windows 7 focus on performance rather than appearance. There is also an option that allow you to customize your Windows graphical appearance by picking and choosing the graphics options you prefer. To read more about adjusting Windows graphical options, click here.

Computer Registry Cleaner

Posted by | Uncategorized | No Comments
Should I Get Computer Registry Cleaner? Yes or No

There has been a lot of debate on how to computer registry cleaner applications. While some are effective others can actually cause damage to your PC. The best way to select a computer registry cleaner is to understand how your computer registry and how these PC optimizers work. To read more about what registry cleaner can do for your PC speed, Click Here!

What is the computer registry?

Lets start with defining your computer registry. Your computer registry is your computer’s ultimate record keeper. It acts a database of all the software installs and uninstalls on your computer. In a sense, it logs all information of major software changes on your Windows operating system. The computer registry is also use to modify your hardware settings, start up and shutdown process computer. It can be tweaked to add additional performance measures.

Does My Computer Registry Need Cleaning?

The registry can eventually become extremely bloated with obsolete information, corrupted entries and improperly uninstalled data. Some of these data can be from spyware. So, you may need to remove the registry entry to completely eliminate the malware. Good spyware cleaners will always search and remove the registry entries from spyware on your PC.

How can you clean your computer registry?

There are two ways to do this. Both have their advantages. You can manually remove computer registry entries by seeking out the exact registry key and removing it. This works best when you have familiarity with the registry system and just looking to eliminate a particular error or entries.

How to search your registry

You can easily open the registry by simply typing “regedit” into the RUN command line. Follow the instructions below:

The other way to clean your computer registry is to use a registry cleaner. This method works best when you need to do a major cleanup of a large amount of files. In the case of someone who has had their PC for a while and looking to stop unwanted programs from loading. You can use a computer registry cleaner to quickly get a speed boost. Click Here to see the Best Registry Cleaner on the market!

Delete Computer History

Do Registry Cleaners work?

Yes, some do a great job in eliminating registry entries, duplicate files and removing uninstalled data. However, they cleaning the registry itself isnt a magic cure-all. A good registry cleaner should provide more than just a quick removal of registry entries. If should be a full service product. Most modern registry cleaners serve to optimize your PC. They will defrag your registry and hard drive, provide you with scheduled clean up feature can provide you with a secure delete to permanently eliminate files and software. A registry cleaner might allow some optimization of your existing hardware to get a better boost of performance.

RELATED TUTORIALS:

Best Registry Cleaners
Speed Up Slow Internet Connection
Stop Buffering Problems

Vista Registry Cleaner

Posted by | Uncategorized | No Comments
How to Edit Vista Registry and Choose a Vista Registry Cleaner

Is a Vista Registry Cleaner different from XP registry cleaners?

Despite, Microsoft’ plans to dramatically change the registry system for the new Vista operating system, there are only a few noticeable difference between previous version of the registry such as the ones found in Windows XP. There have been a few security features to deter malware and spyware from corrupting the harmony of the registry. But there is little else to mention. However, it not a bad idea to get a registry cleaner that is specifically designed for the Vista Operating System. A Vista Registry Cleaner has the ability to easily maneuver and repair the registry. PC Health Advisor elevated itself to the top of Vista Certified Registry Cleaners. Click Here to Learn More

What does Vista Registry Look Like?

Remember that Windows registry is basically a large database which stores all the information for proper startup, shutdown, loading programs and even to maintain computer speed. So to say it is important is an understatement at best. The registry is broken up into a hierarchical system. Think of the registry as basically a hive. At the highest level there is keys that are basically top level folders. These contains folders that are essential for Windows, Programs, and Document and Settings. Withing each folder there are values. The values contain specific information that is added and updated often.
Delete Computer History

The Windows Registry is nothing more than a files system. Just like in Classic Windows you can easily move up and down the document tree and remove folders at will. However, one mistake in the deletion can literally destroy the operating system

Windows Registry Contains five main keys, or hives, each has a specific purpose.

HKEY_CLASSES_ROOT(HKCR)stores information on each program registered with Windows. This key determines how applications are open in Windows and how they interact with other software, hardware, and the Operating system.

HKEY_CURRENT_USER(HKCU)stores settings for the user logged in.

HKEY_LOCAL_MACHINE(HKLM)stores sytem wide hardware and configuration settings for all users.

HKEY_USERS(HKU) contains individual subkeys for all users in Windows. In essence, it loads one of these profiles each time a different user logs in.

HKEY_CURRENT_CONFIG (HKCC) contains temporary information regarding Windows current settings and session. These values continually change while the computer is on. However, be aware that this information is not permanently stored.

How to Get Around And Edit the Registry

The registry is very easy to get to and modify. However, I would not recommend doing so unless without backing up your registry. The best way edit your Vista registry is to use a Vita Registry Cleaner that will allow you to backup and easily modify the registry values. To back up the Registry follow the directions below:

  • Click Start, and then click Run.
  • In the Command Line, type regedit, and then click OK.
  • Find and then click the subkey that contains the value that you want to edit.
  • Under the File menu, click Export.
  • In the Save in box, select a location where you want to save the Registration Entries (.reg) file, type a file name in the File name box, and then click Save.

After saving the current registry files. You can begin to edit specific values. To do so:

  • Load the specific key by clicking it on the left hand plane.
  • Click (+) or (-) signs to expand or collapse the that section
  • Edit the value by right-clicking its name in the display pane.
  • Select modify from the context menu.
  • Enter the new information in Value Data box.

How to Choose a Vista Registry Cleaner

A said before there is little different between the current Windows Registry and Vista Registry. With that said there is also little different between Vista Registry Cleaners and older registry cleaner.

Scan your Registry to fix any Registry Errors. When looking for a Vista registry cleaner you should make sure that the registry cleaning software offers the ability to restore previous version of the registry using a restore point options. This will save you a lot of trouble when there is an error than is difficult to remove. Other features a Vista Registry Cleaner should include are the following:

Fix Windows-Installer Errors
Repair DLL Files
Windows Startup Errors
Internet Explorer Errors
Runtime Errors
Prevents PC from Freezing or Crashing
Restore Correct File & Registry Paths
Broken DLLs, OCX, and ActiveX Components
Corrupt Files
Stabilize Scripting Errors
Tune & Repair Your PC with Diagnostics

Popular Articles

Best Registry Cleaner
Fix a Slow Internet Connection
PC Speed Killers

Dump Crash Data

Posted by | Uncategorized | No Comments
Dump Crash Data in Win 7 and Save Hard Disk Space

It’s important to dump crash data files in Windows 7. Yes this is done automatically. However, your hard drive is a limited resource . You need to constantly eliminate programs and remove temporary data to keep free space. However, Windows 7 still fills your hard drive with tons of crash data without providing you with notification. After your computer crashes, Windows 7 keeps all the information for up to the last fifty crashes. More than likely unless you are computer professional, this information may be completely useless to you. This is a large amount of data that eats up your free space. So if you are running low on disk space, you can recover hard disk space by eliminating these files.

You can eliminate Windows 7 Crash data by going into your registry and instructing your computer to not save all the crash data. You can reduce this number to smaller number. Instead of 40 crashes, you can reduce to a much smaller number such as five. Here is how:

  • Click Start
  • Choose the RUN command
  • Then type regedit/ You can also enter regedit into the Windows Search Bar
  • Press Enter
  • Your registry viewer will load. Browse the registry until you find: HKEY_LOCAL_MACHINE\SYSTEM\CurrentControlSet\Control\CrashControl
  • Double Click the MiniDumpsCount
  • Change the Value to 5

Delete Computer History

Once you loaded the registry editor. You will have the ability to search through the registry tree system until you get to CrashControl.

Delete Computer History

Look in the left plane and you will find the element MinidumpsCount. By double clicking it, You will be ask to edit the DWORD value which indicates how many crash data files are saved

Delete Computer History

By changing the number to a lowering the number to 5. This will dump crash data after 5 saves. This should give you a significant amount of space that you can use that will speed up your PC. Remember that the more space that you can use for other applications and Virtual RAM. Of course there are more traditional ways to save hard disk space such as deleting programs, clearing your temporary folders, clearing your web cache. Fore more information about increasing your disk space, click here.

Related Tutorials

Boost Windows 7 Performance

Update Device Drivers

Posted by | Uncategorized | No Comments
How to Update Device Drivers

Why do you need to update device drivers? Device drivers allow your Windows Operating system to communicate with different hardware devices. Every device on your computer has a driver; cameras, printers, USB, graphic cards etc. Without drivers your system with have difficulty running efficiently and smoothly.

Sometimes your device will suddenly stop working as well as did previously. So before you assume that the hardware has stopped working. There is a possibility you can eliminate the problem by simply updating your drivers. You can manually update your drivers or use software to quickly find and replace your faulty drivers.

Update Device Drivers with just one click using Update Driver Software.

How to Manually Update Device Drivers

You can manually update your drivers by performing a few task. Most drivers can be quickly updated using your operating systems device manager. You can either troubleshoot or update the driver.Before you update your driver you might want to create a Restore Point

In Windows XP

  • Click Start
  • Click Control Panel
  • Click System
  • In the System menu, click the hardware tab
  • Click Device Manager to bring up a full list of hardware drivers.
  • Right click and choose Properties to evaluate the status and troubleshoot the hardware device.

In Vista you can reach the the device manager the following method:

  • Click Start
  • Click Control Panel
  • Click Hardware and Sound
  • Click Device Manager

Delete Computer History

In Windows 7

  • Simply type Device Manager in your Windows Search Bar.
  • Choose Device Manger.
  • Select the Device or Right click to choose Update Driver Software

Delete Computer History

Sometimes you may have to go in search of the driver or use Update Driver Software. This will require you using the driver name that it is indicated driver name section. Or you can find the driver based on the device name. You can do this by visit the manufacturer’s site or by visit a website that allows you to find drivers. Like www.windrivers.com or www.driverfiles.net

Popular Articles

Best Registry Cleaner
Fix a Slow Internet Connection
Speed Up Internet Videos

Proxy Website List

Posted by | Uncategorized | No Comments
Choose from one of our best proxy website list.

Here is some to the best proxy website list based on the on available, security and reliability. However setting a anonymous proxy manually can often be hit or miss. So if you are your a bit frustrated with the process, check out the ratings below. These have proved to be more reliable than most. Also if you trying to remain anonymous, you may want to consider cleaning your surf history to avoid any questionable data you have downloaded being found. Check out Evidence Eraser. This is the best way to cover your web tracks while online.
Delete Computer History

Samair.ru. This site publishes a lists of free and anonymous proxies every day. Their proxies are reliable and secure. The website not only offers a free anonymity checker, to insure that you are surfing anonymously.

  • Reliability: 8.5
  • Security: 9
  • Availability: 9
  • Overall Score: 9.0

Proxy4free.com: This is a proxy website list that offers a large list based on location. You can easily choose which region, country and proxy type. They have an extensive list of transparent and anonymous proxies.

  • Reliability: 8
  • Security: 9
  • Availability 8
  • Overall Score: 8.5

Anonymousinet.com: It is a good website proxy lists that offers a large number of proxies to choose from. In addition, it over the ability to see who is actually running the search by performing a “whois” search.

  • Reliability: 8
  • Security: 8
  • Availability 8
  • Overall Score: 8.0

Proxylists.net: This is a proxy website list offers a rather small number of free anonymous proxies. However, it does have a list of site with more availability. A good hub site for find a proxy.

  • Reliability: 6
  • Security: 8
  • Availability 4
  • Overall Score: 6.0

Want to to find a web proxy website list? Click here…